PayPal Checkout Button Options for Merchant Pages
This document summarizes practical PayPal JavaScript SDK button patterns that merchants can use when placing PayPal-family payment options on product, cart, and checkout pages. The focus is on the current PayPal JavaScript SDK reference and PayPal’s standalone button guidance for standard checkout integrations.
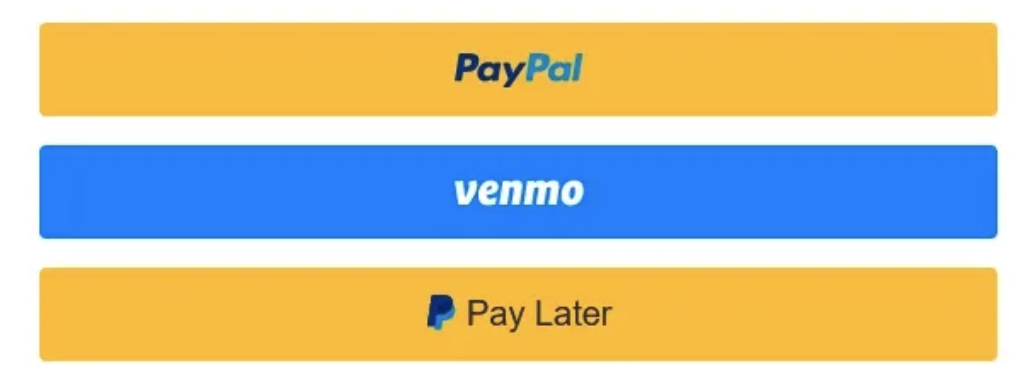
The stack of buttons looks like this:
SDK version and integration context
For most current merchant integrations, the relevant client-side library is PayPal’s JavaScript SDK loaded from https://www.paypal.com/sdk/js. PayPal’s current developer reference documents this SDK as the standard client-side entry point for rendering PayPal-supported payment methods, including PayPal buttons, marks, messages, and related checkout components.
In practical terms, most merchants do not version-pin the script URL with a visible v5 or v6 style path for standard web checkout. Instead, they load the current PayPal JavaScript SDK with query parameters such as client-id, components, enable-funding, disable-funding, currency, and intent, then configure behavior through paypal.Buttons() on the page.
Common integration particulars
These points are common to most merchant integrations using PayPal Checkout on the web:
- The SDK script tag must include the merchant client ID in the
client-idquery parameter. - The page usually includes
components=buttonswhen rendering checkout buttons, and may addfunding-eligibility,marks, ormessagesdepending on the UX being implemented. - The button configuration is created through
paypal.Buttons({...}), typically withcreateOrder,onApprove, andonErrorcallbacks. - When a merchant wants precise control over which PayPal-family buttons appear, PayPal recommends standalone funding-source rendering rather than relying only on the default smart button stack.
- Eligibility still matters even in a merchant-controlled layout, so each standalone button should be checked with
isEligible()before rendering.
Button display models
PayPal supports a few common display models for merchants, and the right one depends on how much control is needed over the checkout presentation.
| Model | Merchant experience | Best use case |
|---|---|---|
| Smart button stack | One button container; PayPal decides which eligible options to show. | Fastest default integration on product or checkout pages. |
| Standalone buttons | Merchant renders individual buttons such as PayPal, Venmo, or Pay Later separately by funding source. | When the page design needs explicit placement or only a selected subset of methods. |
| Marks with radio buttons | Merchant uses PayPal marks as part of a broader payment selector UI. | When PayPal is shown alongside cards or other payment methods in a form flow. |
Recommended option set for many US merchants
A common merchant request is to show only PayPal, Venmo, and Pay Later. PayPal’s standalone button documentation supports that pattern by rendering one button per funding source, while Venmo specifically requires enable-funding=venmo in the SDK script.
That approach is usually preferable when the merchant wants clean, explicit wallet choices on the page instead of letting the smart stack decide everything automatically. It also keeps the implementation maintainable, because each payment option follows the same rendering pattern and remains eligibility-aware.
Example: standalone PayPal, Venmo, and Pay Later
The following example is suitable as a merchant-facing pattern for product, cart, or checkout placement. It intentionally limits the visible PayPal-family options to PayPal, Venmo, and Pay Later, while still using PayPal’s recommended eligibility check before rendering each standalone button.
<div id="paypal-btn"></div>
<div id="venmo-btn"></div>
<div id="paylater-btn"></div>
<script src="https://www.paypal.com/sdk/js?client-id=YOUR_CLIENT_ID&components=buttons,funding-eligibility&enable-funding=venmo¤cy=USD&intent=capture"></script>
<script>
const sources = [
{ fundingSource: paypal.FUNDING.PAYPAL, selector: '#paypal-btn' },
{ fundingSource: paypal.FUNDING.VENMO, selector: '#venmo-btn' },
{ fundingSource: paypal.FUNDING.PAYLATER, selector: '#paylater-btn' }
];
sources.forEach(({ fundingSource, selector }) => {
const button = paypal.Buttons({
fundingSource,
createOrder(data, actions) {
return actions.order.create({
purchase_units: [
{ amount: { value: '49.99' } }
]
});
},
onApprove(data, actions) {
return actions.order.capture();
},
onError(err) {
console.error(fundingSource, err);
}
});
if (button.isEligible()) {
button.render(selector);
} else {
document.querySelector(selector)?.remove();
}
});
</script>Why the array pattern is useful
The sources array is not a special PayPal requirement by itself; it is a clean merchant-side coding pattern for mapping each funding source to a target container. The underlying reason for the pattern is that paypal.Buttons() accepts a single fundingSource per button instance, so multiple standalone options require multiple button instances and multiple render targets.
This keeps the implementation concise and easy to extend. For example, a merchant can add paypal.FUNDING.CREDIT later with one more object in the array instead of duplicating the entire render block.
Important eligibility and market notes
Merchants should expect funding availability to vary by shopper context. Venmo availability depends on eligibility and is explicitly enabled through the SDK parameter rather than appearing by default, while Pay Later also depends on buyer and merchant eligibility conditions.
PayPal’s partner-facing standalone documentation also notes that, for US and UK merchants enabling Pay Later style offers, PAYLATER and CREDIT may both be relevant because the buyer experience can vary based on eligibility. That detail matters when merchants want the widest financing coverage rather than only the simplified three-button layout shown above.
Operational guidance for merchant pages
For most merchant pages, the same base implementation principles apply whether the buttons live on product detail, mini-cart, cart, or checkout pages.
- Use a single SDK script load on the page and configure the necessary components through query parameters.
- Keep the order creation logic consistent with the final checkout amount shown to the shopper.
- Use standalone buttons only when the merchant truly wants curated placement or a restricted option set; otherwise, the smart stack is simpler to maintain.
- Always guard standalone rendering with
isEligible()so ineligible methods do not create broken or empty UI states. - Treat Venmo as a deliberate merchant choice, because it requires explicit SDK enablement and may not be available in all shopper contexts.
Merchant recommendation
For merchants who want a simple wallet-focused presentation, showing PayPal, Venmo, and Pay Later as standalone options is a strong pattern because it is explicit, easy to place in a designed layout, and aligned with PayPal’s documented funding-source approach.
For merchants who want the least custom logic, the smart button stack remains the better default because PayPal handles the eligible mix automatically in a single container. The right decision comes down to whether the page is optimized for control of presentation or for minimizing implementation complexity.
Venmo — testing vs production experience (Embedded SDK)
This document covers Venmo via the PayPal JavaScript SDK — an embedded Venmo button on the merchant checkout page. It explains sandbox vs production UX, presentationMode behavior (auto / popup), why desktop sandbox may show web login (popup or same-tab) instead of a QR code, and what you need for end-to-end testing (including a real Venmo account).
Scope
This doc applies only to Embedded SDK integrations using PayPal JS SDK v6:
- Load
https://www.sandbox.paypal.com/web-sdk/v6/core(sandbox) or production equivalent createInstance({ components: ["venmo-payments", ...] })createVenmoOneTimePaymentSession()withvenmoSession.start({ presentationMode }, orderPromise)<venmo-button>web component on the checkout page- Order lifecycle via session callbacks (
onApprove, etc.) and merchant/PSP backend completion
Venmo is US-only and USD-only, and is subject to PayPal eligibility rules (region, currency, device, buyer account).
Legacy SDK v5 (paypal.Buttons({ fundingSource: 'venmo' }) with enable-funding=venmo) does not expose presentationMode. PayPal chooses UX internally — often same-tab web login on desktop sandbox.
SDK v5 vs v6 (Embedded Venmo)
| Classic v5 Smart Payment Buttons | SDK v6 Venmo session | |
|---|---|---|
| Loader | paypal.com/sdk/js?...&enable-funding=venmo | sandbox.paypal.com/web-sdk/v6/core |
| Venmo button | paypal.Buttons({ fundingSource: 'venmo' }) | <venmo-button> + createVenmoOneTimePaymentSession |
| Presentation control | None — PayPal decides | presentationMode: "auto" or "popup" on session.start() |
| Order shape | Bare order id string | { orderId: string } promise |
Use v6 when you need to influence whether Venmo web login opens in a popup window vs same-tab navigation.
Presentation modes for testing (SDK v6)
Venmo session.start() accepts presentationMode:
| Mode | Behavior (sandbox desktop) |
|---|---|
auto | Recommended. Tries popup web login first; falls back if popups are blocked or unavailable |
popup | Forces a popup window for Venmo web login (id.venmo.com) |
| Fallback (blocked popups) | Same-tab navigation to id.venmo.com — merchant page is replaced by Venmo sign-in |
All of the above are web login flows in sandbox — not the production desktop QR modal.
PayPal v6 reference: auto tries popup first and may fall back to modal in some scenarios; for Venmo on desktop web, popup or same-tab redirect to web login is typical in sandbox.
Popup blockers: If the browser blocks popups, popup mode may fail with a recoverable error; retry with auto or allow popups for the harness origin.
Embedded SDK flow
After the shopper clicks Venmo, the SDK — not the merchant — decides whether to app-switch (mobile), show a production desktop QR, or open Venmo web login in a popup or same tab. The merchant page is not left via a hosted approval_url redirect integration.
Sandbox vs production UX
PayPal documents the following behavior for embedded SDK Venmo (Test Venmo in sandbox):
| Environment | Desktop browser | Mobile + Venmo app | Mobile without Venmo app |
|---|---|---|---|
| Sandbox | Web login flow (popup or same-tab) — no desktop QR | App-switch to Venmo app | Web login flow |
| Production | QR code modal (scan with Venmo app) | App-switch to Venmo app | Web login flow |
Why desktop sandbox shows web login, not a QR code
If you click an embedded Venmo button on a desktop browser in sandbox and see Venmo web login at id.venmo.com (in a popup or the same tab), that is expected behavior.
PayPal explicitly states:
In the production environment, consumers will experience QR code-based checkout on their desktop browser. Sandbox testing of the desktop QR code is currently unavailable.
Do not treat popup vs same-tab web login as a misconfiguration. Desktop QR is a production-only SDK experience.
Production desktop QR flow
On live credentials, clicking the embedded Venmo button on desktop opens a QR modal overlay. The shopper scans with the Venmo app, approves in-app, and the SDK returns to onApprove on the merchant page.
Real Venmo account required for testing
PayPal sandbox provides PayPal sandbox personal and business accounts for API and wallet testing. Venmo is different: PayPal lists self-service test account creation under Venmo features not supported in sandbox (Pay with Venmo — test). There is no fake Venmo buyer you can spin up in the PayPal Developer Dashboard the way you create @personal.example.com sandbox PayPal accounts.
To complete an end-to-end embedded SDK Venmo approval in sandbox, you must use a real Venmo account:
| Test scenario | What you need |
|---|---|
| Mobile app-switch (recommended for sandbox) | Real Venmo iOS or Android app installed and logged in with a real Venmo account. Browser must be Safari on iOS or Chrome on Android (PayPal eligibility requirement). |
| Desktop sandbox web login | Authenticate through Venmo’s web login with a real Venmo identity. A PayPal sandbox personal account email alone is not sufficient. |
| Production desktop QR | Live merchant credentials; scan QR with Venmo app logged into a real account. |
Important nuance: Even though you use a real Venmo account, the transaction still runs in PayPal sandbox when using sandbox client IDs — no real money moves. PayPal cannot simulate a fake Venmo wallet the way it simulates PayPal sandbox buyers, so the Venmo payer identity must be real.
Not applicable here: Braintree’s fake-venmo-account-nonce is for Braintree server-side tokenization tests only. Embedded PayPal JS SDK integrations do not use Braintree nonces.
Eligibility and troubleshooting
Currency and region
- Currency: USD only. Non-USD SDK sessions typically fail Venmo eligibility.
- Region: US merchant and US buyer context.
Button visibility
Check v6 eligibility before rendering:
SDK v6 eligible venmo=trueIf eligible=false, do not show the Venmo button. Common causes:
- Non-USD currency
- PayPal eligibility rules (region, device, merchant configuration)
- Sandbox merchant not Venmo-enabled
Changing currency or buyer context requires re-initializing the SDK instance and re-checking eligibility.
Common confusion
| Observation | Explanation |
|---|---|
eligible=true but desktop shows web login, not QR | Expected in sandbox. Desktop QR is production-only. |
| Venmo button missing entirely | Eligibility failed — check currency, region, and SDK logs. |
| Popup on one test, same-tab redirect on another | presentationMode, popup blockers, or browser differences — both are valid sandbox web login. |
Same-tab id.venmo.com after choosing popup | Popup blocked — allow popups or use auto with fallback. |
| Full-page navigation after clicking Venmo in sandbox | Venmo web login in same tab — not a missing QR widget. |
Sandbox error amounts
PayPal supports negative-path testing in sandbox with specific order amounts (Pay with Venmo — test):
| Amount | Error scenario |
|---|---|
| 12.34 | INSUFFICIENT_FUNDS |
| 21.43 | ACCOUNT_CLOSED |
| 11.45 | ACCOUNT_FROZEN |
| 10.23 | SUSPECTED_FRAUD |
| 13.42 | GENERIC_DECLINE |
| Other | SUCCESS |
Set the order amount to one of these values before clicking the Venmo button.
How to test (Embedded SDK v6)
- Load PayPal JS SDK v6 core with
venmo-paymentscomponent and USD currency. - Render
<venmo-button>; confirmfindEligibleMethods().isEligible("venmo")before display. - Wire
createOrderPromiseto return{ orderId }from your backend or PSP session. - Set Venmo presentation mode to
autoorpopupon the harness (or your integration). - Allow popups for the merchant origin when testing
popupmode. - For the most representative sandbox flow, use mobile Safari or Chrome with the Venmo app installed and a real Venmo account (app-switch).
- On desktop sandbox, expect web login (popup or same-tab) — do not expect a QR code.
- Handle
onApproveand complete the payment on your backend (capture or PSP completion). - For production desktop QR, validate with live credentials — treat as a go-live checklist item.